Tuesday, June 18, 2013

Recycled blue jean whale...attempt

So let me start off my saying this is kind of embarrassing. I saw this denim whale on Pinterest and thought it was so so cute. I guess I kind of like whales.


Thomas' whale
PHOTO CREDIT: MEVROUW WALVIS, Valaan villapaita.

My husband just happened to have jeans he was getting rid of. (Let me clarify. Jeans he had to get rid of. Two pairs with large holes in the crotch. It was time). If you don't have jeans to cut up, you could get some cheap ones at a thrift store. When I was ready to take on the project, it actually took a bit of work to find the original source of this awesome whale. The pin only took me to pictures, and provided no link. I had read somewhere how to find a picture's original source, which came in handy. In case you don't know:

1. Right click on the image
2. Select "Copy Image Location"
3. Paste it into your google search bar and search.
4. At the top it will say "for matching images, try 'search by image.'" Click on that.
5. It will then give you a list of pages that include matching images and you should be able to find the original source.

So...anywho, after doing that. I found this blog, Valaan villapaita, which according to google translate means whale sweater in Finnish. No worries if you don't read Finnish, she provided an English translation of her tutorial. The tutorial is not a pattern, just pictures with step by step instructions. I liked that, because I don't love following patterns. But, when you see my whale, you might think I needed a pattern. :)

Here are all my pieces cut out. First mistake. I cut them too small. It made a dinky whale and it was a little harder to work with small pieces.


Here he is. That's right...scroll back up and look at the big whale...now mine. Not the same. But I'm just considering it a practice round. We all have Pinterest attempts that don't turn out...right, RIGHT?


Thursday, June 13, 2013

Brown Sugar Chocolate Chip Cookies

This is my beloved, go-to chocolate chip cookie recipe. Growing up, I loved making chocolate chip cookies, so it's become kind of a nostalgic thing. My family is a little obsessed with chocolate chip cookies. My dad actually throws out parts of the cookie that don't have any chocolate to offer.
 
 
I started using this recipe that I got from one of my sisters a few years ago and it's my favorite. There's no white sugar, only brown sugar. I've adapted it along the way, so here's the recipe:

Preheat oven to 375 degrees. Combine:
 
1/2 cup unsalted butter
1 1/4 cups packed brown sugar
2 Tbsp milk
1 Tbsp vanilla
1 egg

Mix well. Add:

1 1/4 cups flour
1 tsp salt
3/4 tsp baking soda

Mix well. Add 1 1/4 cups chocolate chips (I prefer semi sweet. Or, if I'm feeling fancy, 60% dark). Try not to eat too much of the dough.

Bake on a greased cookie sheet for 8-10 minutes. They are best right out of the oven of course. Enjoy!


Salt Dough Footprint

I tried out this salt dough that I saw on the imagination tree. It worked great! I didn't paint it, like they did, but I'd like to do it again when my baby is a little older and let her paint it. I do also wish I'd put a hole in the top, so the footprint could be hung.


Adjustments I made: I used an ever-so-slightly greased cookie sheet, rather than baking parchment when putting the dough in the oven.

Monday, June 10, 2013

Easy DIY Coasters

I love these coasters! They are fun to make, they don't take long, they are inexpensive, and they are useful...I use mine every day! This would be a fun project for older kids too. The original pin I saw them on is no longer a valid link, so I can't give you the source.


Here's what you'll need:

4x4 tiles from home depot ($0.16 each)
Scrapbook paper
Ruler, pencil, and scissors for cutting paper
Mod Podge
Paint brush
Clear spray paint
Adhesive felt circles

They are so easy!

1. Measure and cut your scrapbook paper into squares, slightly smaller than your tiles.
2. Use paint brush to put a little mod podge directly on a tile. Place scrapbook square on top and apply more mod podge. Smooth mod podge with paint brush. 
(Complete this step for all your coasters before going to step #3)
3. Take coasters outside and spray moderately with clear spray paint.
4. Let coasters dry until they don't smell like spray paint.
5. Apply small felt circles to the bottom corners of your coasters.


Friday, June 7, 2013

Small Serving Brownies

Who doesn't have a Pinterest board dedicated to desserts? I sure do. The Craving Chronicles is to thank for this one. I made these brownies last night and they were SO good. The best part is that there was just enough for two (one for me, one for hubs) so there was no temptation to binge. I am trying to be more french, after all.


I followed the recipe as is, EXCEPT that, sadly, I did not have dark unsweetened cocoa powder. I just added a little extra of the regular cocoa powder and put in slightly less sugar than what is called for. And I didn't add the optional chocolate chips. What's your favorite Pinterest dessert?

Thursday, June 6, 2013

DIY Facial Products

I've always had dry, sensitive skin. I am also pretty cheap so I don't like spending a lot of money on products. And I'm weary of using lots of chemicals. I've found some great solutions for my skin and I hope some of them may be helpful for you too!

I saw this pin a while ago and have been using my homemade eye makeup remover for a year or so. It has worked great for me. The pin that I saw was from don't just live your life, love it!


If you want exact measurements, check out the cited post. Here's what I do:

1. Fill up bottle half way with water
2. Give it a squirt of baby shampoo
3. Add a little olive oil 

Like I said, it has worked well and I like that I'm moisturizing the skin around my eyes with olive oil. It works just as good as the expensive store bought stuff I was using before.

Not from Pinterest, but related to this, is my face wash. I used to use Noxzema back in the day. Besides the weirdo smell, it worked fine, but I felt like there were a billion chemicals. (Turns out it is pretty hazardous. Look up your beauty products' hazard ratings here). Luckily, I have an awesome sister (3 awesome sisters, actually) who told me about Dr. Bronner's Magic Soap. I use the baby mild liquid soap. I just dilute it with water and sometimes add peppermint oil. It has worked great on my skin. The 32 ounce bottle is around $14, but it lasts forever. I have also started using it for my baby. It's much more gentle (and less hazardous) than the typical baby wash I was using.


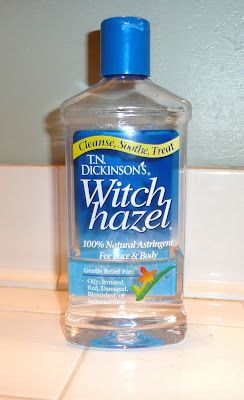
Last facial product tip is Witch hazel. Not really DIY, because you just use it as is. But it works great as a toner and it's cheap! I've read that you can use it to treat many things, including baby eczema. (It's recommended to dilute it with water first).

Tuesday, June 4, 2013

Tea Cup Candles

I've done this one a couple times. It's pretty easy and fun and they make great gifts. The pin I saw led me to Pretty Prudent. You'll find instructions for how to make the candles there. 

This was before I trimmed the wicks. Also, don't you love that whale mug?

Just a couple of pointers:

-Go to thrift stores to find your tea cups or mugs. It's my favorite part. These were 50 cents each. 

-You don't need a double boiler. You can put a glass jar in a bot of boiling water, or use a bowl as shown in the tutorial. 

-You also don't need to use a thermometer, although maybe it makes a difference...I don't know. (Like I said, not a perfectionist).

-The last time I made these, I bought a really cheap candle that was on sale and re-melted the wax. This was cheaper than buying the wax. You just have to make sure you are okay with the scent if you go this route. I just stuck the glass container that the candle was in straight into the boiling water. I had to let some wax melt, pour one candle, then let more wax melt.

-It really helps to glue down your wick, as the tutorial says. The first time I made these, I didn't and it was a hassle to keep the wick in place.