Showing posts with label crafts. Show all posts

Tuesday, June 18, 2013

Recycled blue jean whale...attempt

So let me start off my saying this is kind of embarrassing. I saw this denim whale on Pinterest and thought it was so so cute. I guess I kind of like whales.


Thomas' whale
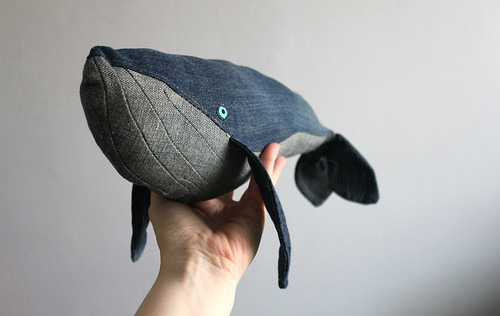
PHOTO CREDIT: MEVROUW WALVIS, Valaan villapaita.

My husband just happened to have jeans he was getting rid of. (Let me clarify. Jeans he had to get rid of. Two pairs with large holes in the crotch. It was time). If you don't have jeans to cut up, you could get some cheap ones at a thrift store. When I was ready to take on the project, it actually took a bit of work to find the original source of this awesome whale. The pin only took me to pictures, and provided no link. I had read somewhere how to find a picture's original source, which came in handy. In case you don't know:

1. Right click on the image
2. Select "Copy Image Location"
3. Paste it into your google search bar and search.
4. At the top it will say "for matching images, try 'search by image.'" Click on that.
5. It will then give you a list of pages that include matching images and you should be able to find the original source.

So...anywho, after doing that. I found this blog, Valaan villapaita, which according to google translate means whale sweater in Finnish. No worries if you don't read Finnish, she provided an English translation of her tutorial. The tutorial is not a pattern, just pictures with step by step instructions. I liked that, because I don't love following patterns. But, when you see my whale, you might think I needed a pattern. :)

Here are all my pieces cut out. First mistake. I cut them too small. It made a dinky whale and it was a little harder to work with small pieces.


Here he is. That's right...scroll back up and look at the big whale...now mine. Not the same. But I'm just considering it a practice round. We all have Pinterest attempts that don't turn out...right, RIGHT?


Thursday, June 13, 2013

Salt Dough Footprint

I tried out this salt dough that I saw on the imagination tree. It worked great! I didn't paint it, like they did, but I'd like to do it again when my baby is a little older and let her paint it. I do also wish I'd put a hole in the top, so the footprint could be hung.


Adjustments I made: I used an ever-so-slightly greased cookie sheet, rather than baking parchment when putting the dough in the oven.

Monday, June 10, 2013

Easy DIY Coasters

I love these coasters! They are fun to make, they don't take long, they are inexpensive, and they are useful...I use mine every day! This would be a fun project for older kids too. The original pin I saw them on is no longer a valid link, so I can't give you the source.


Here's what you'll need:

4x4 tiles from home depot ($0.16 each)
Scrapbook paper
Ruler, pencil, and scissors for cutting paper
Mod Podge
Paint brush
Clear spray paint
Adhesive felt circles

They are so easy!

1. Measure and cut your scrapbook paper into squares, slightly smaller than your tiles.
2. Use paint brush to put a little mod podge directly on a tile. Place scrapbook square on top and apply more mod podge. Smooth mod podge with paint brush. 
(Complete this step for all your coasters before going to step #3)
3. Take coasters outside and spray moderately with clear spray paint.
4. Let coasters dry until they don't smell like spray paint.
5. Apply small felt circles to the bottom corners of your coasters.


Tuesday, June 4, 2013

Tea Cup Candles

I've done this one a couple times. It's pretty easy and fun and they make great gifts. The pin I saw led me to Pretty Prudent. You'll find instructions for how to make the candles there. 

This was before I trimmed the wicks. Also, don't you love that whale mug?

Just a couple of pointers:

-Go to thrift stores to find your tea cups or mugs. It's my favorite part. These were 50 cents each. 

-You don't need a double boiler. You can put a glass jar in a bot of boiling water, or use a bowl as shown in the tutorial. 

-You also don't need to use a thermometer, although maybe it makes a difference...I don't know. (Like I said, not a perfectionist).

-The last time I made these, I bought a really cheap candle that was on sale and re-melted the wax. This was cheaper than buying the wax. You just have to make sure you are okay with the scent if you go this route. I just stuck the glass container that the candle was in straight into the boiling water. I had to let some wax melt, pour one candle, then let more wax melt.

-It really helps to glue down your wick, as the tutorial says. The first time I made these, I didn't and it was a hassle to keep the wick in place.

Monday, June 3, 2013

Homemade Hand Towels

Lets start off with this little gem. I saw these hand towels on Pinterest, which led me to The Creamer Chronicles. I immediately thought of my dear Mom and knew she would love it. Even though I am a grown adult, she still loves homemade gifts. (Or so she says). Anyway, I rounded up some material that I already had and a dish towel. The blog sited above will lead you to a free downloadable pattern. Follow the pattern and you're good to go. The hardest part? The button hole. I struggle with button holes. I'm sure they aren't that bad when you know what you're doing, but I'm a moderate seamstress at best. 

I only made one towel, with a hot pad to go with it.